Blog Master the Art of Cheese Storage: Tips for Keeping Cheese Fresh and Mold-Free
03 November, 2024

Master the Art of Cheese Storage: Tips for Keeping Cheese Fresh and Mold-Free

Similar

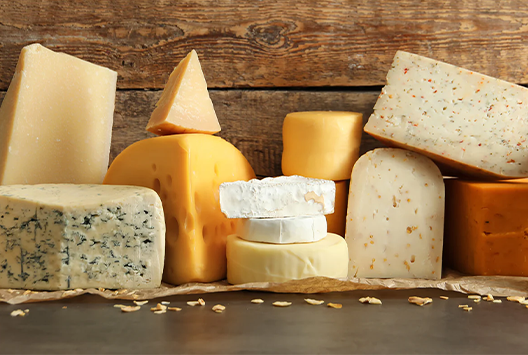
A fridge is never complete without the presence of cheesy delights. It’s a versatile and delicious ingredient that can take the flavors of any meal to a whole new level. However, keeping cheese fresh and mold-free for an extended period can be challenging, even if stored in the fridge. But worry not! We’ve put together a list of some of the effective ways to store cheese to prevent mold growth and extend its shelf life.


Use the original packaging


Most cheese comes in its original packaging, designed to keep it fresh for as long as possible. Therefore, leaving the cheese in its original packaging is advisable until you're ready to use it. The packaging helps prevent moisture loss and keeps the cheese from absorbing odors from other foods in the fridge. The packaging also includes a label with the cheese's name, expiration date, and storage instructions.


Wrap cheese in wax paper


You can wrap the cheese in wax paper if the original packaging is unavailable. Wax paper allows the cheese to breathe while preventing it from drying out. Be sure to wrap the cheese tightly to keep air out, which can cause mold growth. You can also use parchment paper or cheese paper specifically designed for storing cheese.


Avoid plastic wrap and aluminum foil


Plastic wrap and aluminum foil are not ideal for storing cheese for an extended period. Plastic wrap can trap moisture, causing the cheese to become slimy, while aluminum foil can cause the cheese to oxidize and develop off-flavors. If you must use plastic wrap or aluminum foil, be sure to wrap the cheese tightly and use it within a few days.


Store cheese in the right part of the fridge


The temperature and humidity in different parts of the fridge vary, and storing cheese in the wrong part can lead to mold growth and spoilage. The ideal temperature for storing cheese is between 35°F and 45°F. Therefore, it's best to store cheese in the vegetable or cheese drawer, where the temperature is more consistent and less likely to fluctuate. Avoid storing cheese in the door of the fridge, as the temperature fluctuates every time the door opens and closes.


Wrap cheese in cheese paper


Cheese paper is specifically designed for storing cheese and helps regulate moisture and air exchange. It's made of two layers of paper with a layer of plastic, which helps keep the cheese fresh and prevent mold growth. You can wrap the cheese tightly in the cheese paper and store it in the cheese drawer of the fridge.


Wrap soft cheese in plastic wrap


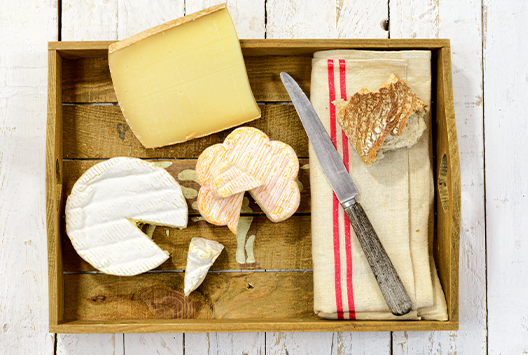
Soft cheeses like brie and camembert are delicate and can easily absorb odors and flavors from other foods in the fridge. Therefore, it's best to wrap them tightly in plastic wrap to prevent them from drying out and absorbing odors. Soft cheeses should be consumed within a few days of opening to ensure freshness.


Store cheese in an airtight container


You can store cheese in an airtight container if you don't have cheese or wax paper. Be sure to choose a container slightly bigger than the cheese to allow air circulation. You can also place a paper towel in the container to absorb any excess moisture and prevent mold growth.


Keep your cheese fresh for extra goodness 


Cheese is the ultimate culinary delight - a delicious ingredient that transforms dishes with its cheesy magic! But keeping it fresh requires some effort from your end. Make sure to follow the tips above to keep your cheese as fresh as ever.


If you’re looking for high-quality cheese, Baladna is the answer. We offer authentic, fresh, and high-quality dairy products of all kinds. Browse through our website to get a glimpse at our offerings.
More Articles

Blog Traditional Greek Dishes with Feta Cheese You Must Try
14 May, 2024

Traditional Greek Dishes with Feta Cheese You Must Try

The world of feta cheese is a salty, crumbly one - and we have Greece to thank for that. This cheese has been a favorite in many cultures and cuisines for centuries, and are you even surprised? It’s delicious and goes well with so many different meals. It’s also what makes Greek Salad so irresistible. Aside from its savory goodness, it’s also loaded with essential vitamins and minerals. It’s also packed with protein and light on the fat, so it’s a win-win option for those who lead a healthy lifestyle. The best part about feta cheese is its versatility. One can’t help but get creative with this type of cheese, and we’re here to share two dishes that you must try to make with the feta cheese you have hanging around in your fridge. SpanakopitaSpanakopita is a beloved Greek snack and one of the most popular dishes in Greek cuisine, and for good reason. It is a flaky pastry parcel filled with a delicious combination of sautéed spinach, gooey feta cheese, and a unique blend of herbs and spices. It makes for a great appetizer, side dish, or even a light meal. To make the filling, sauté the spinach with onions and garlic to add a rich depth of flavor that pairs nicely with feta cheese. Once cooled, add chopped parsley, crumbled feta, grated Parmesan cheese for extra cheesy goodness, and some salt and pepper to taste. You could also add your favorite herbs and spices as well. The pastry used to make spanakopita is light and flaky, and is usually made from layers of butter and flour, rolled out, and filled with spinach and feta. Alternatively, you can use store-bought phyllo pastry to make the preparations much easier. All you have to do is butter a pan and layer your phyllo pastry on top of each other, with butter separating the layers. Pour the spinach and feta mixture over the phyllo dough layers and then fold the edges of the phyllo dough over the spinach mixture. Bake in a pre-heated 375°F oven for 30-40 minutes or until golden brown.Baked FetaWhen cooking with feta, using only the finest Greek feta is key. That is because feta from Greece is known for its superior flavor, texture, and quality. Baked feta, in particular, requires the best feta to ensure a delicious and memorable meal. This traditional Greek recipe is a must-try! All you have to do is bake a block of feta with tomatoes, peppers, and onion to create a wonderfully aromatic dish that will impress. The combination of flavors creates an unbeatable combination of salty, tangy, and sweet. To prepare this recipe:1. Preheat your oven to 375°F.2. Cut the feta into cubes and place in a baking dish.3. Add the tomatoes, peppers, and onion, and drizzle with olive oil.4. Sprinkle with oregano, basil, and salt and pepper to taste.5. Bake in the preheated oven for 25 minutes.The feta cheese will soften and melt into the vegetables, while the tomatoes and peppers will become slightly charred. Adding herbs and spices will infuse the entire dish with a delicious aroma. It’s always better with feta Feta cheese is a magical ingredient that can leave different types of palates amazed. From salads to appetizers, there is so much you can do with feta cheese. If you want the finest Greek feta cheese, check out what Baladna has to offer. We pride ourselves on bringing only the best exotic cheeses to the market. So, if you want to take Greece to your home, order our feta cheese now!

Blog Grilled Halloumi Cheese: Perfectly Delicious Recipes
24 June, 2025

Grilled Halloumi Cheese: Perfectly Delicious Recipes

Halloumi cheese is loved around the world for its unique texture and salty flavor. Originating from Cyprus, this semi-hard cheese stands out because it doesn’t melt when grilled. Instead, it develops a golden, crispy outside with a soft, chewy center. Whether you’ve enjoyed halloumi before or are just getting started, learning to grill it perfectly will take your meals to the next level.How to Grill HalloumiGrilling halloumi is simple and quick. Here’s how to get it just right:Heat the Grill or Pan: Preheat your grill or pan so it’s nice and hot. This will help the halloumi get that perfect sear.Slice the Halloumi: Cut the cheese into thick slices, about 1/3 to 1/2 inch thick. Thicker slices stay firm, while thinner slices may fall apart.Oil It (Optional): While halloumi doesn’t require oil, brushing it with a little olive oil can add flavor and prevent sticking.Grill It: Place the slices directly on the grill or pan. Cook for about 2-3 minutes on each side, or until they turn golden-brown.Serve Immediately: Grilled halloumi tastes best when it’s hot and fresh. Enjoy it right off the grill for the best texture and flavor.Grilled Halloumi Recipe InsposOnce you’ve grilled your halloumi, there are endless ways to enjoy it. Here are a few easy ideas:1. Grilled Halloumi SaladToss your grilled halloumi into a fresh salad with kale, tomatoes, cucumbers, parsley, and quinoa. Drizzle a lemon-orange dressing over the top for a zesty touch. The salty halloumi pairs perfectly with the crisp veggies, creating a deliciously balanced meal.2. Halloumi SkewersThread grilled halloumi onto skewers along with bell peppers, zucchini, and cherry tomatoes. Grill until lightly charred and serve with a side of hummus for dipping. The combination of smoky veggies and salty cheese makes for a flavorful, easy-to-eat snack.3. Halloumi and Avocado ToastUpgrade your avocado toast by adding slices of grilled halloumi on top. The creamy avocado and salty halloumi make for a satisfying snack or light meal that’s perfect for any time of day.4. Halloumi BurgersReplace the usual burger patty with a slice of grilled halloumi in your next burger. Top it with roasted veggies and a garlic red pepper aioli for a flavorful and delicious twist on the classic burger.5. Grilled Halloumi with Pesto CiabattaTake your grilled halloumi and toasted ciabatta and spread a generous amount of pesto on each half. Layer the grilled halloumi on the bottom half, add a handful of fresh arugula or spinach, and top with the other half of the ciabatta. For extra flavor, you can add sliced tomatoes, sundried tomatoes, or roasted red peppers. Final ThoughtsGrilled halloumi is a delicious and easy way to elevate your meals. Try Baladna Halloumi today and enjoy the simple pleasure of perfectly grilled halloumi!

Blog Spreadable Cream Cheese: Easy & Tasty Snack Ideas
23 June, 2025

Spreadable Cream Cheese: Easy & Tasty Snack Ideas

Cream cheese is a universal favorite — among both kids and adults alike. Whether you're looking for something quick and satisfying, or a more sophisticated bite for a party, Baladna’s spreadable cream cheese is the perfect go-to for such times. It’s time to get creative in the kitchen and put together treats your kids will love. Here are a few ideas:1. Cream Cheese & Veggie CrackersThis simple, tasty snack requires just a few ingredients: whole-grain crackers, Baladna Spreadable Cream Cheese, and fresh vegetables.How to Make:Spread a generous amount of cream cheese on each cracker.Top with thinly sliced cucumbers, cherry tomatoes, or bell peppers.For extra flavor, sprinkle some za'atar.2. Cream Cheese PinwheelsFor a fun and playful snack, cream cheese pinwheels are perfect for kids.How to Make:Spread Baladna Spreadable Cream Cheese on a soft tortilla.Add slices of turkey and spinach leaves.Roll tightly and slice into bite-sized pinwheels.3. Cream Cheese and Za'atar PiesThese pies combine the savory tang of za'atar with the rich creaminess of Baladna Spreadable Cream Cheese, offering a delicious twist on the traditional za'atar manoushe.How to Make:Use store-bought or homemade za'atar manoushe or mini za'atar pies.Add a spoonful of cream cheese on top.Serve warm and enjoy!4. Cream Cheese & Olive BitesFor a quick Mediterranean-inspired snack, try cream cheese and olive bites. The salty olives pair perfectly with the creamy richness of Baladna Spreadable Cream Cheese.How to Make:Spoon Baladna Spreadable Cream Cheese onto small slices of baguette or toast.Top each slice with a few olive halves (green or black).For an extra touch, sprinkle some dried herbs like oregano or zaa’tar.Whether you're planning a quick on-the-go snack for your kids or an easy lunch for school, Baladna Spreadable Cream Cheese brings a deliciously creamy touch to every meal. Enjoy these simple recipes that are sure to make your school season preparations a delight!